Suzie Card-Maker

10/26/2010
Update on the PEO card-making project ...
We had our second and last work-session last night here with eight of us working like rock stars for 2.5 hours. We completed 179 cards, sorted and packaged them! We hope to sell them all which would net us $447. Wow! What a major project -- accomplished! and ready to make money for the PEO projects which help further the education of women with loans and grants!
Anniversary Card

This is a 20th anniversary card made for my husband's sister and brother-in-law for their 20th wedding anniversary. I used the color of the bridesmaid dresses for the card base in the form of SU! Tempting Turquoise. The image is part of the SU! Delight in Life set. I stamped two of the flowers, cut them out, and adhered one to the scalloped circle and the second one I popped up with SU! Dimensionals. The flower was colored with an SU! Tempting Turquoise marker and brushed with Crystal Effects. I penned the little white dots all around the circle. I wish I would have embossed the circle with a folder beforehand to give it more dimension.
Of course, it is a gate-fold card design. The white Bazzill panels were run through the Cuttlebug Dotted Swiss folder. And, again, I used one of the sentiments from SU! Short and Sweet set. The punches I used were the SU! Word Window and the Modern Label.
Both the scallop circle and the sentiment help to keep the card closed.
It is a rainy, cool morning in Minnesota. The leaves have been blowing off the trees this week. Looks like we are progressing the the later part of fall. There is still one beautiful maple with quite a few of its red leaves still attached which we can see out our living room window, though. Have a great day wherever you are!
10/25/2010
Baby Shower Card

Finally, a card to post! Last night I hosted our second PEO card-making work session. We finished all 179 cards! Eight of us worked non-stop for 2.5 hours. They are ready for sale and in the hands of the Ways 'n Means chairman.
Today I am sharing a quick and easy baby shower card which I made for our niece's baby shower. Erin and her hubby have decided to be surprised with the sex of their first child, so I used So Saffron and Certainly Celery for her card. The mat was embossed with a Sizzix baby folder. To be honest, I can't remember if I used a Marvy Uchida scallop punch or a Nestabilities die! I did use white Bazzill and embossed it with the Cuttlebug Dotted Swiss folder. The ribbon is SU! Certainly Celery. The buttons are from my "stash" and the "welcome baby" is stamped with Versafine Black Onyx and punched using the SU! Word Window punch. The sentiment is, of course, from SU! Short and Sweet.
10/19/2010
Too busy to post ...

There are times when posting gets put on the back burner and this has been one of those times. That certainly doesn't mean that I haven't been making cards. And I do take pictures of almost every single card I design. They just don't always get posted in a timely manner or the pictures might sit in my camera for a while longer than they should. We'll be leaving town in another week. I hope to get some card-making done while we are gone. If I do, I might not get the time to post. And, of course, Thanksgiving will be coming as well as Christmas. We'll have family staying with us for both holidays (which always makes the holidays even better), so we'll be very busy just like you all. In case I don't get anything posted by Halloween, have a very Spooky Halloween!
P.S. I was going to post a Halloween card from my "stash", but apparently I didn't get pictures taken of any of them! They must have fallen between the "photo-taking" cracks! I found this image of the pumpkin family in Google Images.
10/09/2010
Two More Pictures


I thought I'd show you a side-view of all the cardstock I trimmed this week. There are over 150 card bases and as you can see, even more mats! Last night I stood at the kitchen island and stamped over 110 images to go on the cards. We are making "thinking of you" and "thank you" cards this time. Back to work, I've got ribbon to cut, more daisy chains to punch, and I plan to punch a bunch of the scalloped mats so that some of the gals can just put the cards together while others do punching, coloring, and stamping if they want to do so. This is not a group of hardcore cardmakers, but after this project, there might be a few!
Have a great fall weekend! It is just incredibly beautiful here in south central Minnesota now. And thank you, again, for stopping by!
Fundraiser Work-bee Prep


You can see how busy I have been preparing for the fundraiser work-bees! I've already gone through two trimmer blades. The proceeds from the sale of these cards will go towards PEO projects which support women's education. PEO offers grants and loans to women who need help financing further education as well as funding the 2-year women's college in Nevada, MO called Cottey College. Thanks for stopping by!
10/05/2010
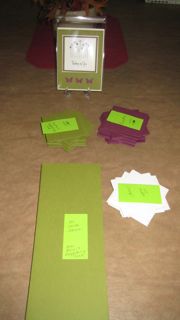
PEO Chapter Fundraiser Projects


My PEO Chapter needed to think of a new fundraiser. A number of years ago, I designed some cards for us to make and sell for a fundraiser within the chapter. We decided to do it, again, this year in conjunction with our annual silent auction in November. I designed these three cards which we will be making at two work-bees this month at my house. It is a great way to get together, too, and get to know one another even better.
Today I begin "trimming" all the cardstock elements. I have them all measured out and all the materials ordered. They should arrive tomorrow from Stampin' UP. In the meantime today, I will work from my supplies and keep track of that. I will be using most of the colors shown in the pictures except I will be using So Saffron for the yellow card (I just grabbed some yellow Bazzill from my stash for the example). And I may use Pear Pizzazz instead of Old Olive on some of the cards with the butterflies as I hear Pear Pizzazz looks great with the Rich Razzleberry, too. :D
We are hoping to make sets of 5 cards per package. I just bought a couple of small "Thank You" stamps yesterday so that we can make both "Thinking of You" and "Thank You" cards with these designs. If we are lucky, we might get 50 - 100 cards made during the two work-bees. If we don't get them all finished, at least, we will have them cut and ready to go. I can just keep putting them together at my leisure.
Thanks for stopping by! Enjoy this beautiful fall season wherever you are!
10/03/2010
B is for Boy

A baby boy card for our niece and nephew who are having their first baby in January . . . the card base is SU! Soft Suede with a mat of SU! Wild Wasabi followed by a mat of Doodlebug Zoofari patterned paper. The stamped images are Recollections Bouncin' Baby Boy and Cornish Heritage Farms Baby Love. The images were stamped with Versafine Onyx Black . I colored the giraffe with SU! Close to Cocoa and So Saffron. I matted the images with SU! Soft Suede and paper-pierced around the edges and used my corner-rounder on the image and its mat. The ribbon is SU! Wild Wasabi. I used the SU! slot punch to secure the ribbon on the image layer and used the sentiment "tiny little thing, great big blessing" by Hampton Art Stamps Great Big Blessing on the inside. Thanks, again, for stopping by!
Red, White, and Blue Birthday

For this birthday card, I chose red, white, and blue just because I like them together. (They are also two of our grandson's favorite colors. :D) The cardstock is by SU! using Real Red and Night of Navy. The gingham ribbon is from my stash. The Cuttlebug embossing folder is the happy birthday words folder. I used my Marvy Uchida punches for the image circle and scallop mat. The stamp used is SU! Party Hearty. The little birthday gift in the center of the "b" is popped up using SU! Dimensionals. I love using the Signo white gel pen to accent. I used my corner-rounder (which isn't really doing a good job of rounding anymore) for the bottom of the card base and the Night of Navy mat. This is the kind of card design that is great for mass production. I used Real Red, Night of Navy, and Glorious Green to stamp lots of the images, made a variety of Cuttlebug-embossed mats, and also used a variety of punches and ribbon.
It is a beautiful fall day here. Hope it is where you are as well. Thanks for looking!
10/02/2010
Thinking of You Versions


Yesterday as I strolled through Michael's, I came across some Recollections patterned paper I really liked. It was 4 for $1, so I bought it. It had really jumped out at me for some reason. When it came time for me to do something with it last night, I had a tough time figuring out to use it. My first attempt was the lower card. I used Nestabilities circles for the stamped image and its mats. The ink I used is Versacolor 17 Violet. I don't know the name of the SU! stamp I used as I bought it used and it wasn't in its original box. Sorry! I also used SU! Very Vanilla cardstock, the SU! Modern Label punch, and SU! Word Window punch. The "Thinking of You" stamp is from the SU! Three Little Words set. The gems are by Kaiser. I wasn't particularly pleased with the card, so I decided to try, again, to get a better design.
Version 2 is the top photo and worked out better, don't you think? I dug around in my stash for some dark brown ribbon and used SU! Chocolate Chip cardstock to mat the stamped image circle. On my first attempt at this design, I stamped the "Thinking of You" (by Stampendous) too high. I covered that side totally with the print and flipped the card over to stamp the sentiment, again, more carefully. By now, a little frustration was beginning to set in, but I was determined not to toss this card out! I also put the coordinating purple paper on both parts of the inside. (It also covered the ribbon.) I loved that the purple gems from my stash matched the patterned paper perfectly. I also stamped the smaller version of the flower image on the inside along with the sentiment "You are never more than a thought away" (SU! Whimsical Words). Thank you for looking AND reading my ramblings this morning! Have a great weekend!
Subscribe to:
Posts (Atom)